The dentist will visually examine the tooth and may take digital X-rays to accurately evaluate the full depth and extent of the decay or structural damage. They will then determine if a composite restoration is the most appropriate and conservative treatment option.
If the decay has penetrated deep into the dentin layer, the dentist will administer local anesthesia to numb the nerve of the tooth and the surrounding gum tissue. This ensures that you don't experience any pain or sharp discomfort during the drilling and preparation phase.
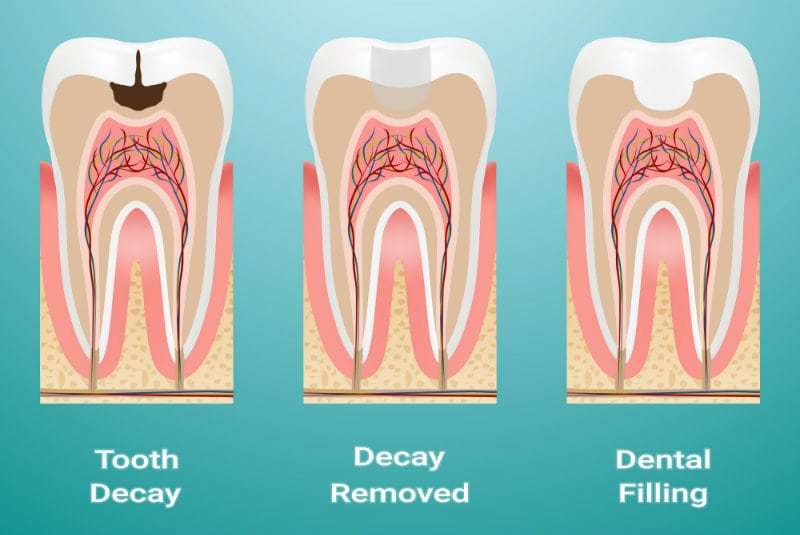
The dentist will use a specialized dental drill, air abrasion, or a dental laser to completely remove the diseased, decayed, or damaged portion of the tooth. The remaining healthy tooth structure is then cleaned, shaped, and prepared to create an optimal space for the composite filling material to bond.
The dentist will apply a mild acidic solution (etching gel) to the prepared tooth surface. This creates a microscopically rough surface, which significantly enhances the mechanical bond between the tooth and the composite material. After etching, the tooth is rinsed and dried, and a liquid bonding agent (primer/adhesive) is applied and cured.
The dentist will apply the tooth-colored composite resin material into the prepared cavity in thin layers. The putty-like material is carefully sculpted, shaped, and molded to perfectly match the natural anatomical contours of the tooth. Different shades and opacities of composite may be blended to achieve a virtually invisible, natural appearance.
After each layer of composite material is correctly sculpted into place, the dentist uses a specialized ultraviolet (UV) or LED curing light. This intense blue light activates a photo-initiator chemical reaction within the resin, causing it to harden and securely lock into place within a matter of seconds.
After the composite material is fully hardened, the dentist will trim and shape it using finishing burs to verify the height does not interfere with your natural bite. Finally, they use ultra-fine polishing discs and pastes to smooth the surface of the filling, making it glossy and allowing it to blend seamlessly with the surrounding natural enamel.
Once the restoration is complete, the dentist will evaluate the final result, ensuring the margins are sealed and the bite is comfortable. They will provide personalized instructions on daily oral care and hygiene practices to maintain the longevity of the composite restoration.